
|
I like using our decals as photo props, anything from a name, to numbers to little tiny hearts. I used our heart pack in mint, an oversize wet-chalk board, straw flowers and some twine for a little subtle charm...  Let's be real, I have no idea what is in your pantry! We wanted to offer a pantry label set that would work for everyone. Our vinyl works awesome with dry erase markers in case you are anything like us and nothing stays in the same container or you can go the permanent route with sharpies. 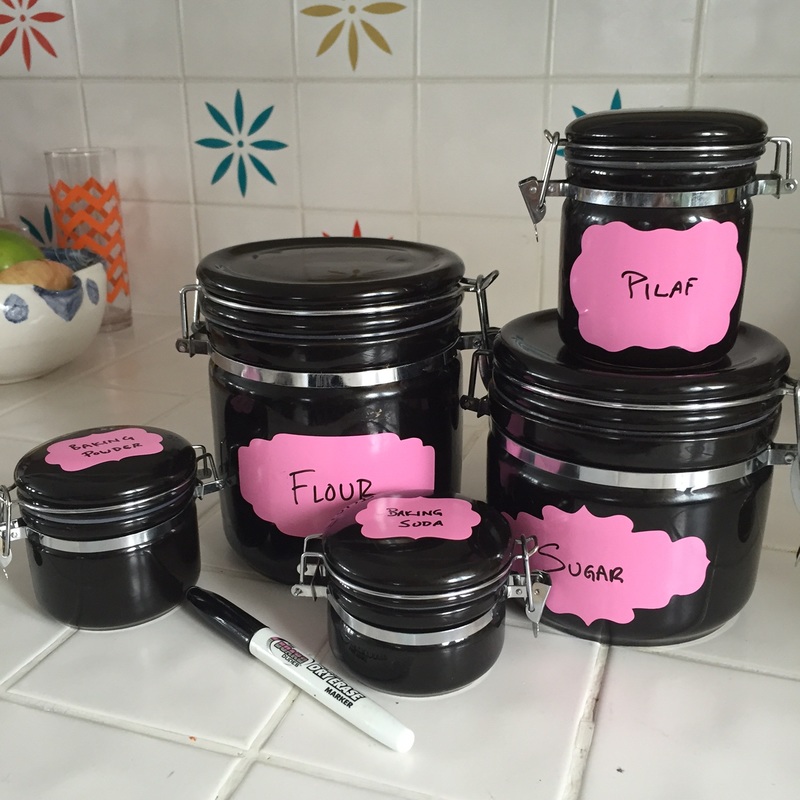 You will need: Label Decals - 15 Per sheet Dry Erase or Permanent Marker 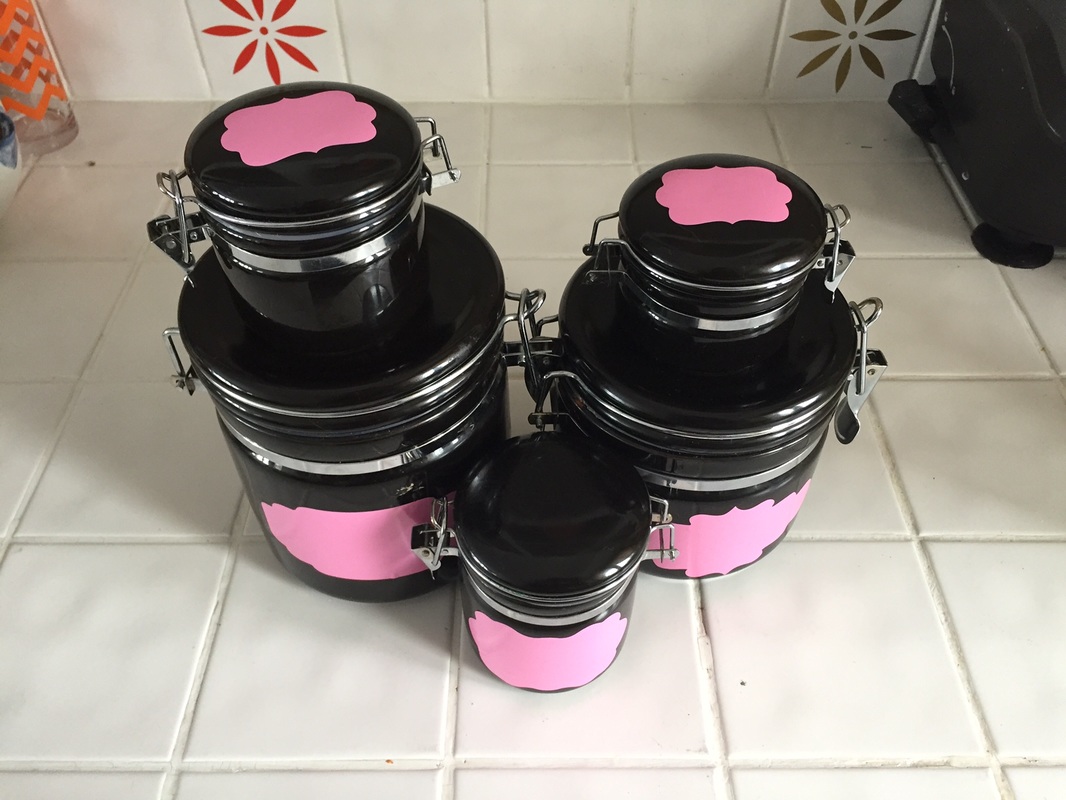 Clean and dry your jars or containers, peel off the decals and stick them on like a sticker - it's that easy! Some other ideas: toy room bins, clothing drawers, art supplies, etc 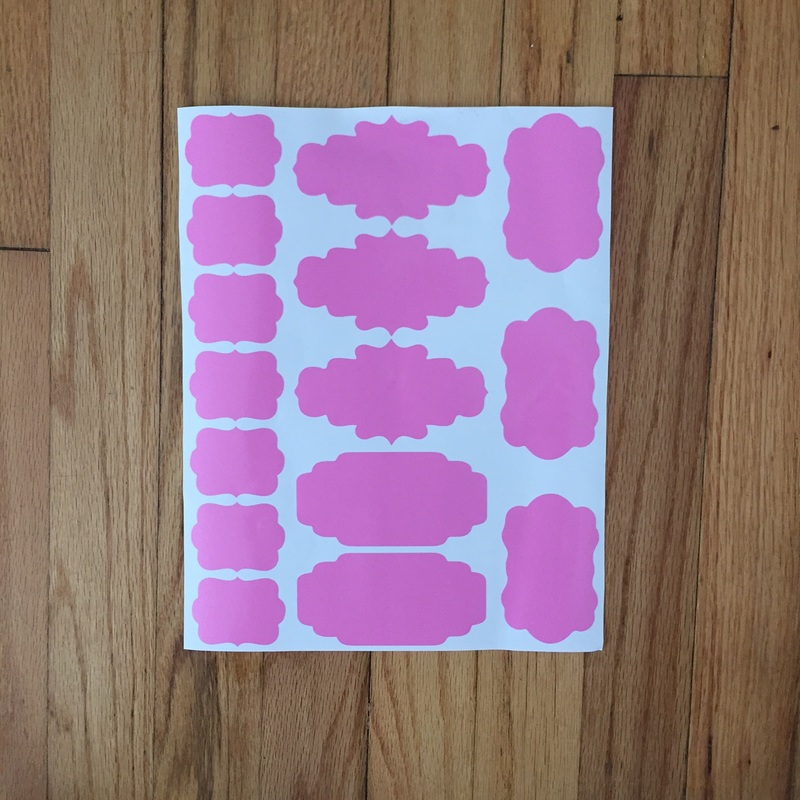 Pantry labels are in our Etsy store for $8.00 per sheet of 15
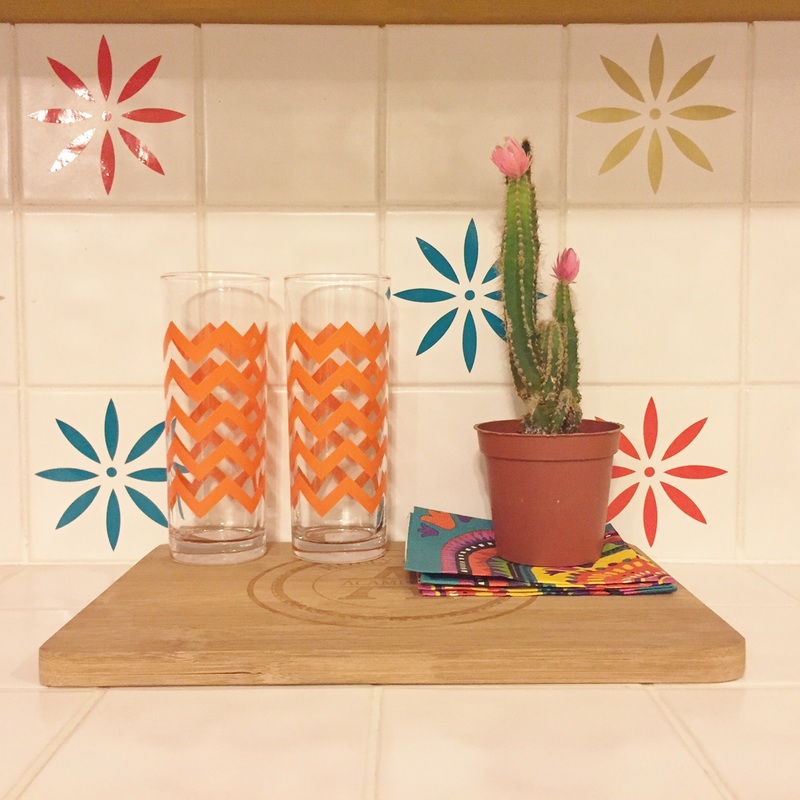
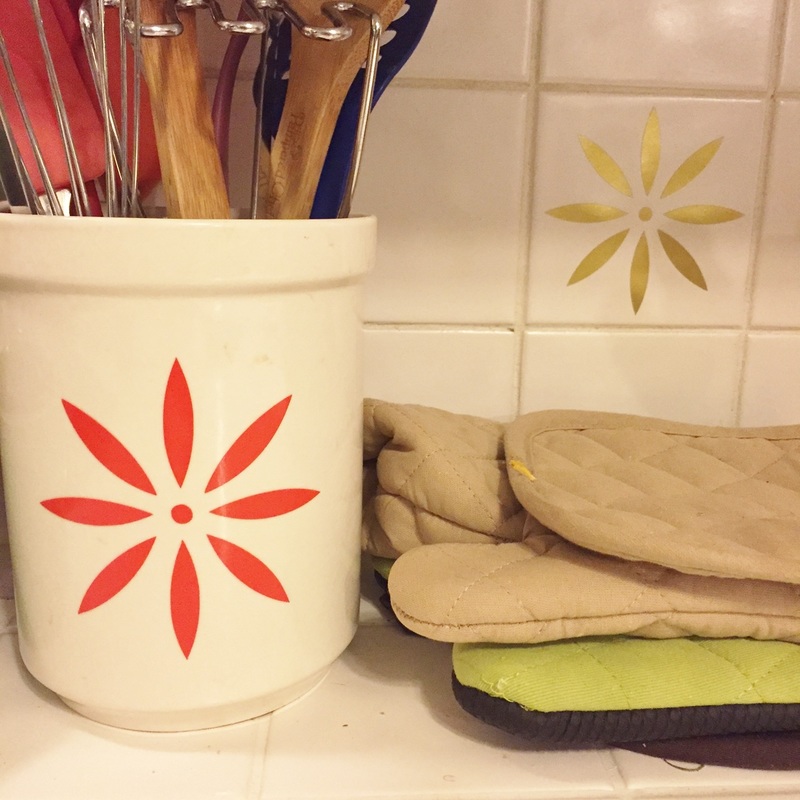
Let me start out by saying that I despise white tile. Our shower, kitchen back-splash AND kitchen counter-top are made of 4 x 4 white tiles with white grout. It's ugly and gets dirty way too easily. I've been meaning to spruce up our kitchen with some vinyl for a while now and finally got inspiration. This is a great alternative if you are renting or want to add some color on the cheap. 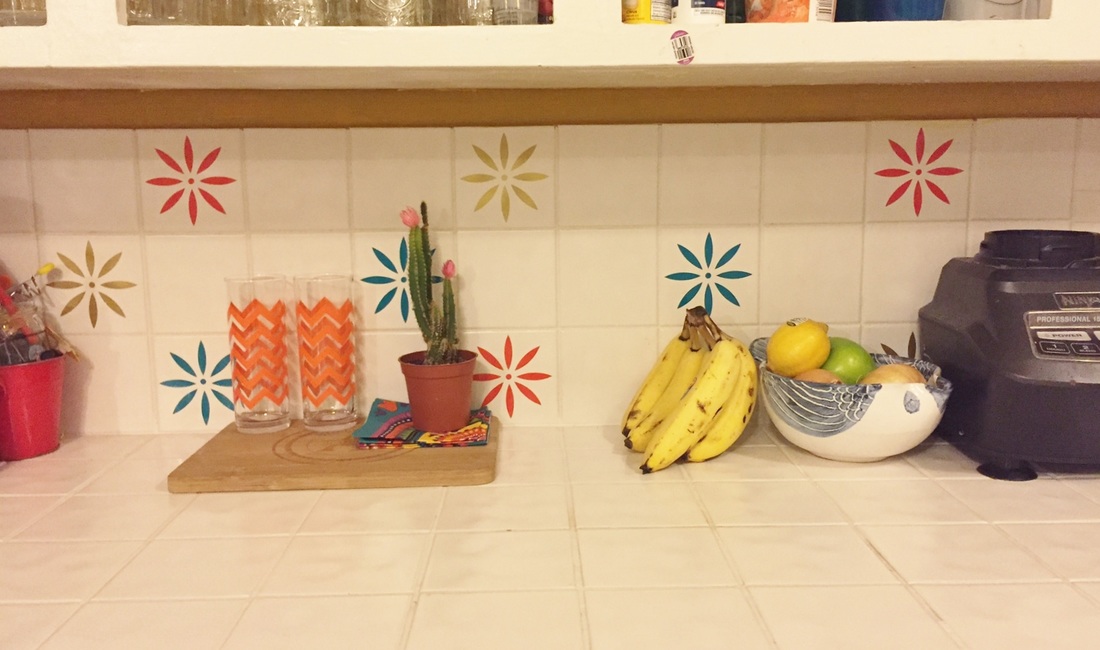 We just put out these really cute 8 petal flowers, they are really simple and versatile and are sold in sets of 4. Made to fit perfectly on 4 x 4 tiles but can be used on any smooth surface (appliances, jars, etc) I used 1 sheet each of Gold, Orange Red and Teal Blue (12 total flowers) You will need: Flower Decals Scissors Credit Card or piece of stiff plastic to smooth out bubbles 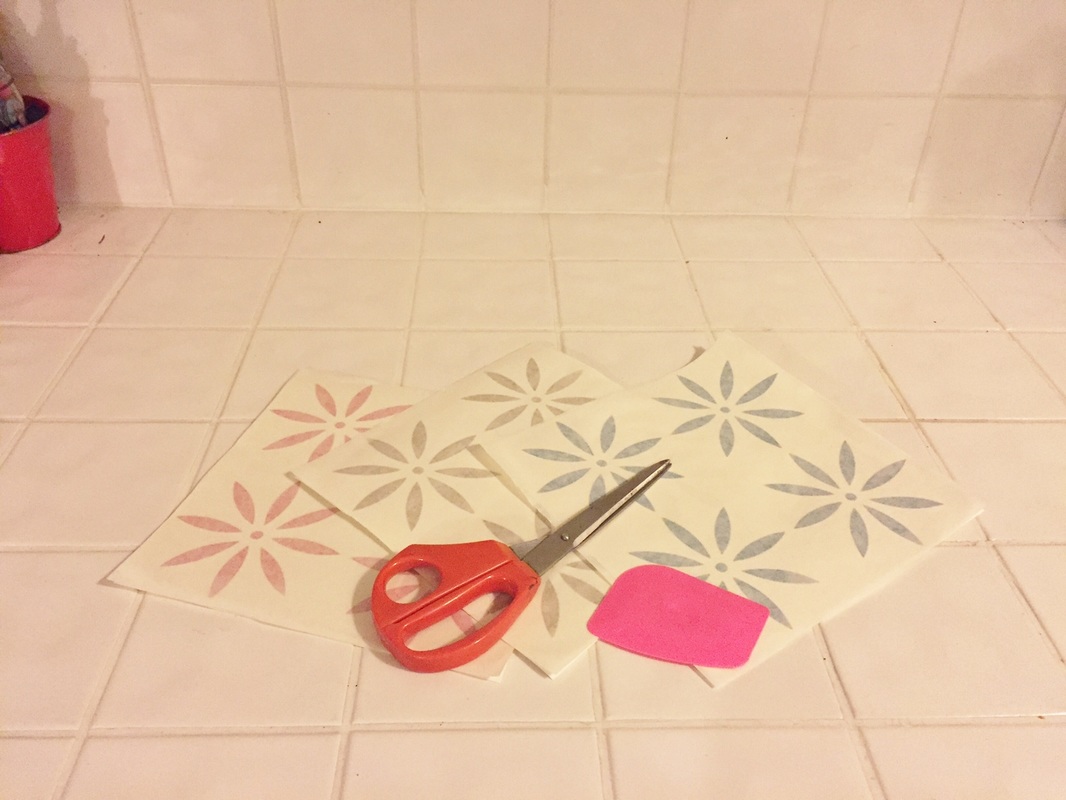 To start I cleaned all the tiles with windex and made sure they were dry. Decals will not stick to a wet or dirty surface! Pro Tip: If the tiles are cold and decals wont stick, apply the decal and without removing the adhesive transfer paper, gently heat with a hairdryer to warm both the tile and decal. Smooth out with your fingers and then remove the transfer paper. I then laid out my decals how I want them on the back-splash. Always plan ahead, although our decals can be removed, they cannot be reused. 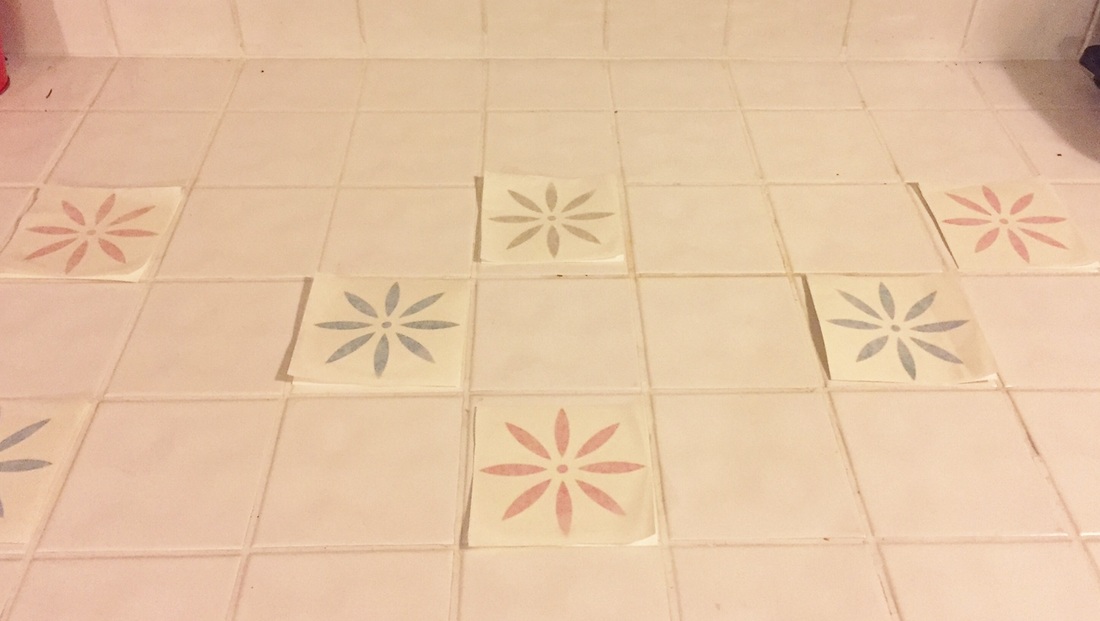 Working from left to right, I peeled off the white backing and applied them to the tiles. 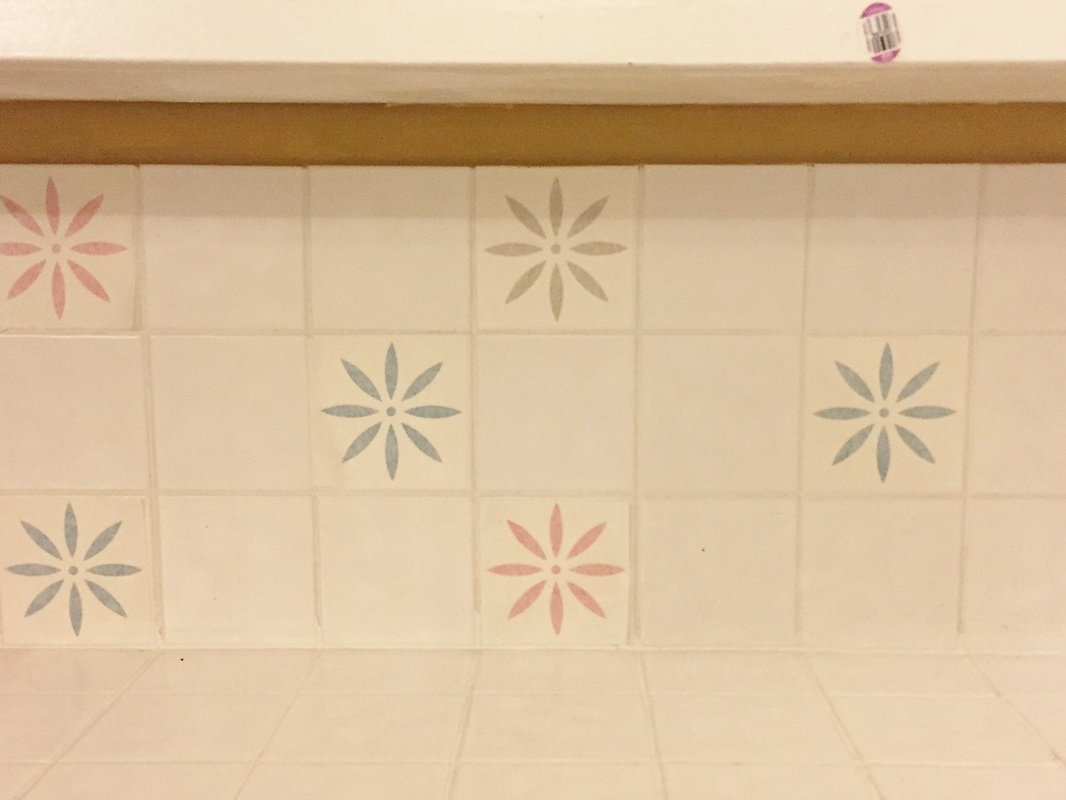 Smooth out any bubbles with your credit card/plastic piece and carefully peel back the opaque application paper. 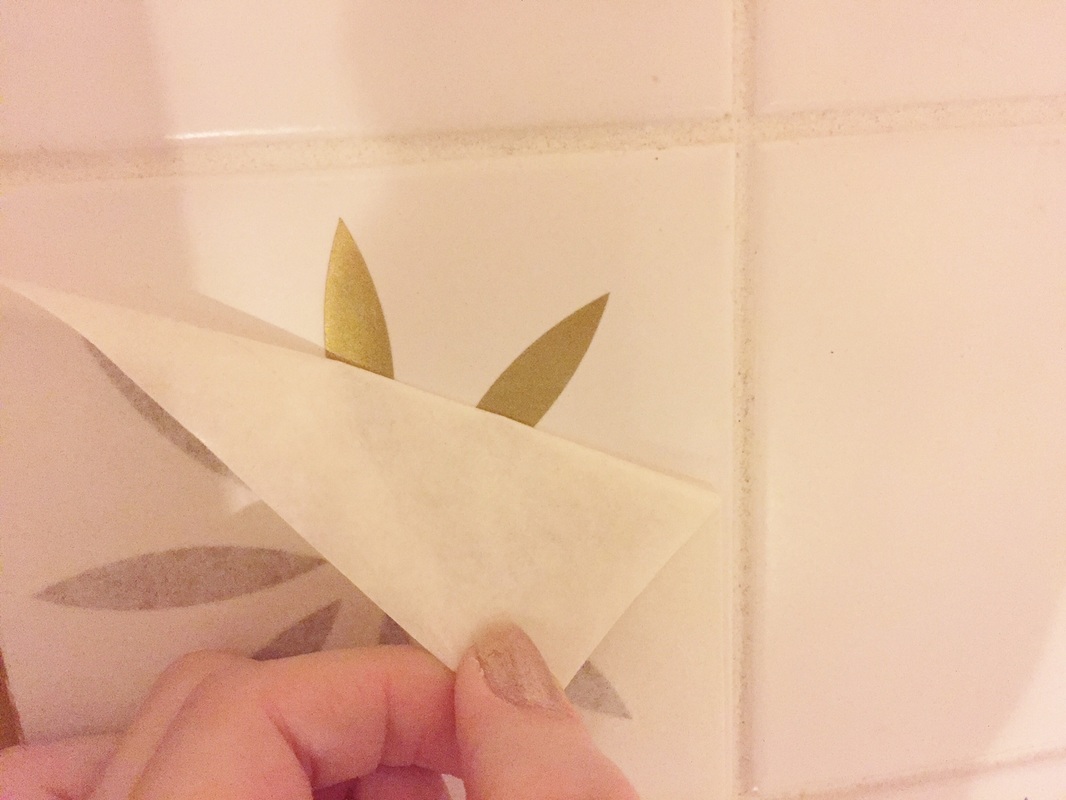 Now step back and enjoy! I also put one on another part of back-splash next to our stove and one on a utensil holder to tie it all together. 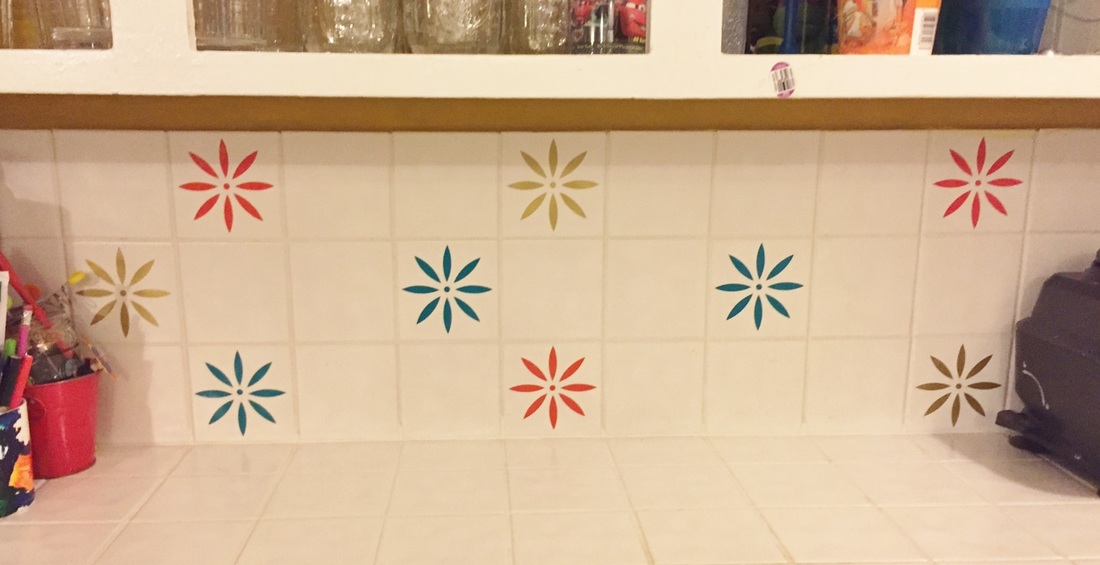
The decal sheets start at $5.00 for 4 Flowers and we have a special discount for ordering multiple sheets! Visit our etsy page to get yours
if your fridge is anything like ours (covered in expired coupons and the masterpieces of a 5 year old) then I'm sure you've dreamt of a quick fix to make it ever so slightly prettier. With our big leafy decals, you can put a piece of paradise right into the kitchen. 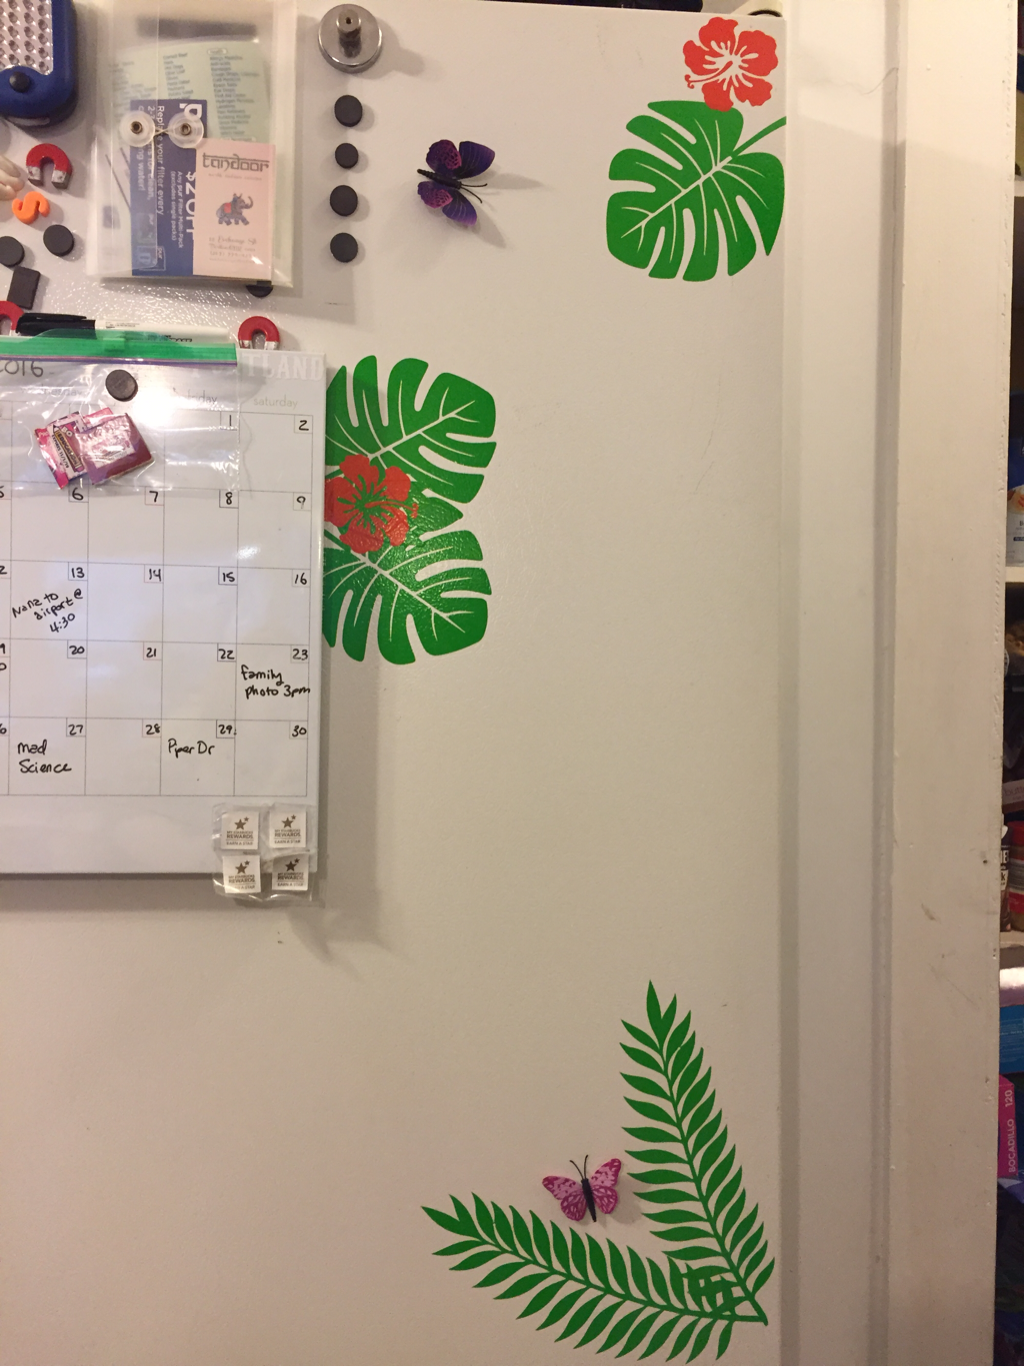 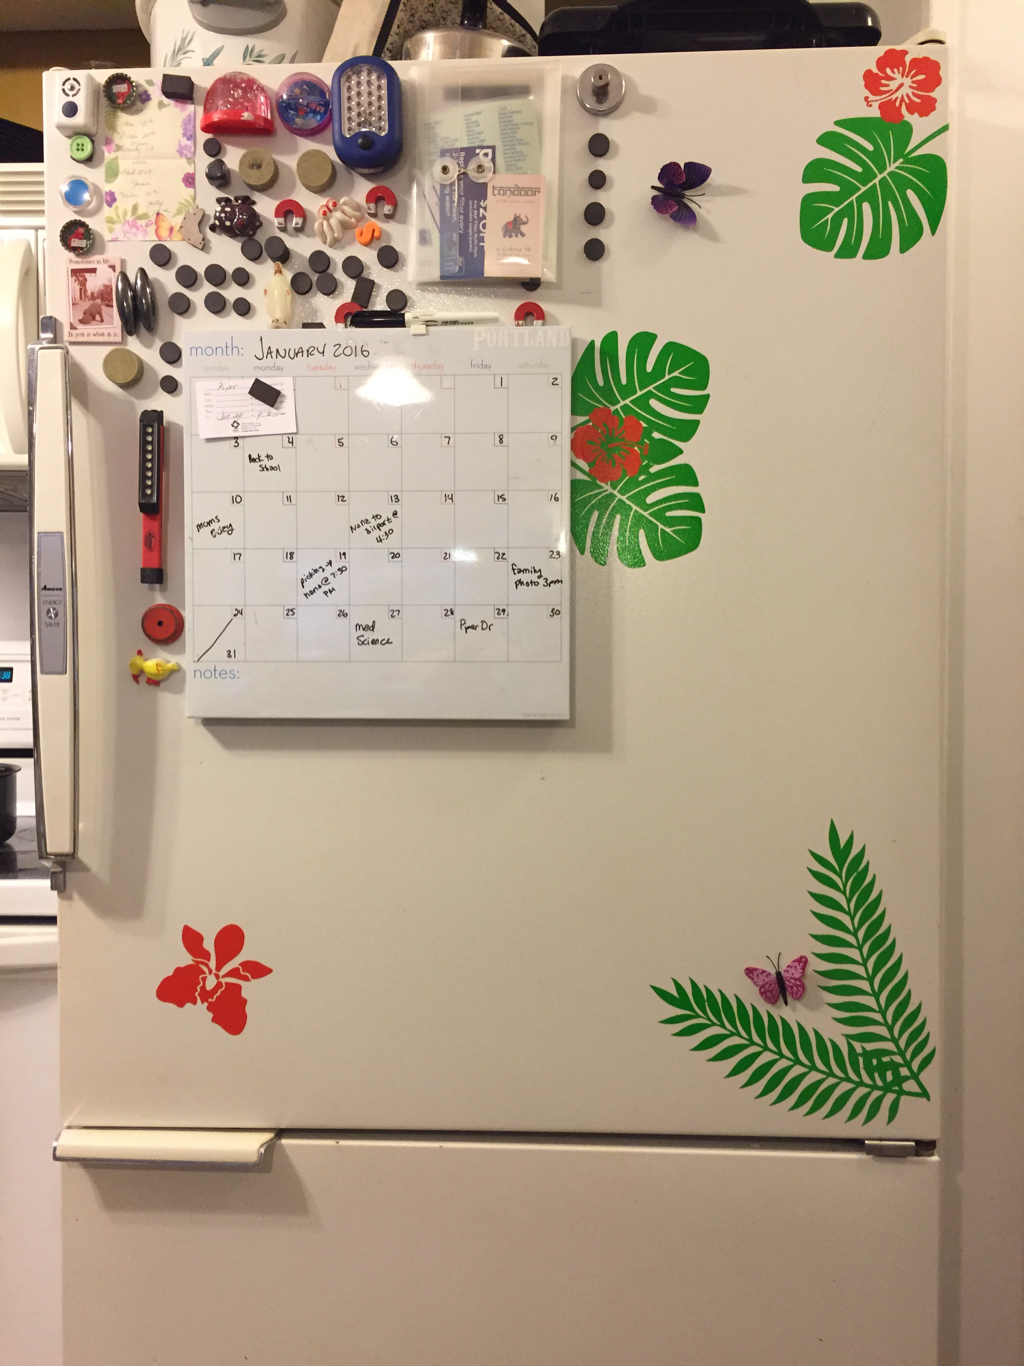 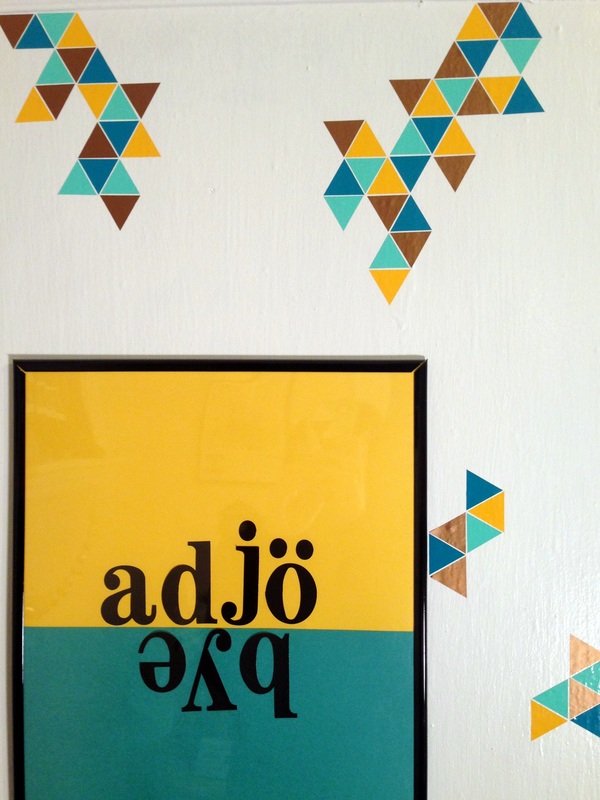 Vinyl decals are an inexpensive way to add some pizazz to a plain spot in your home or office. Shape decals make it especially easy when you mix and match them! Colors shown in this DIY Door: Yellow, Copper, Teal Blue and Mint. 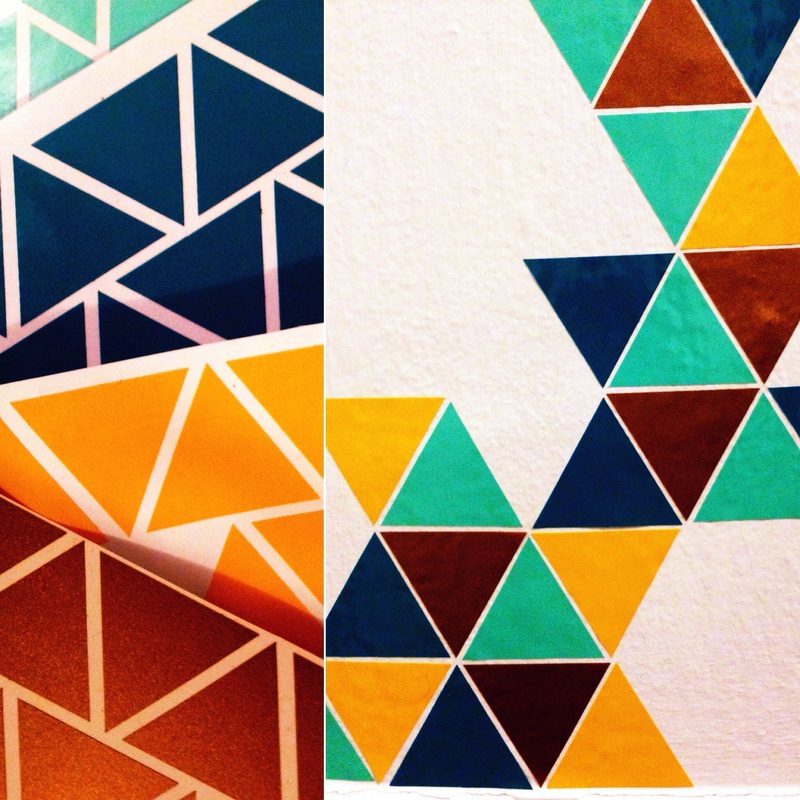 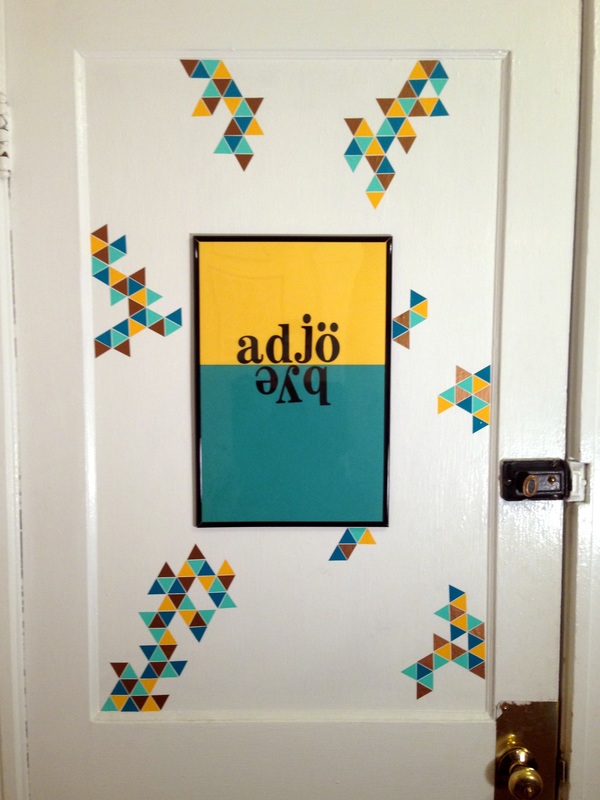 Triangle Decals are on sale for $8.00 this month for 84 1" Triangles
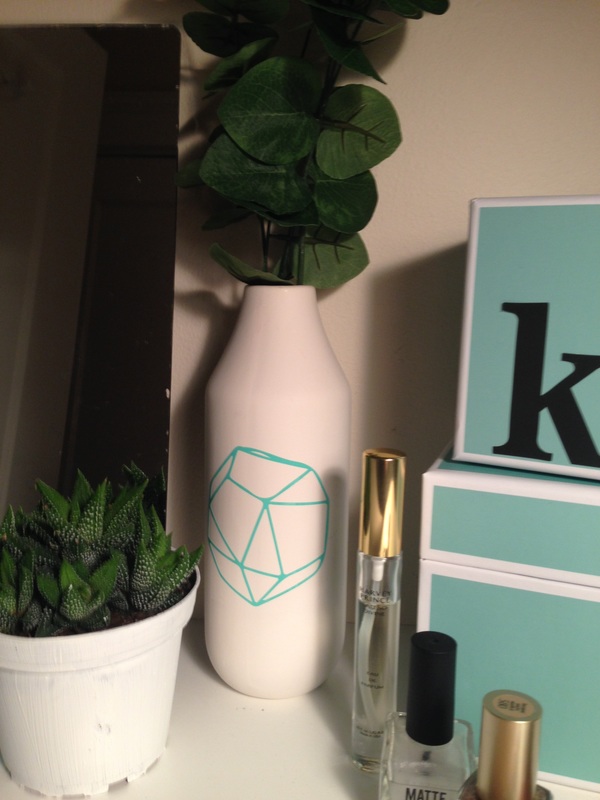
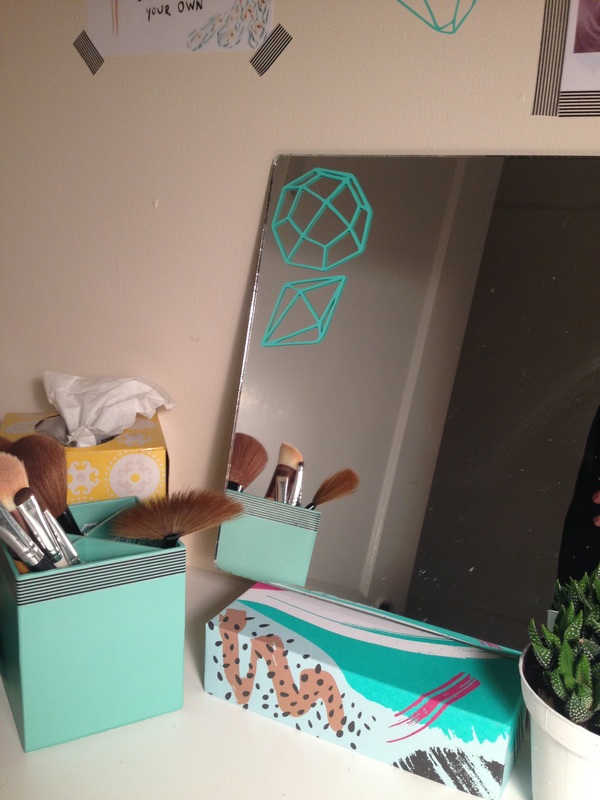
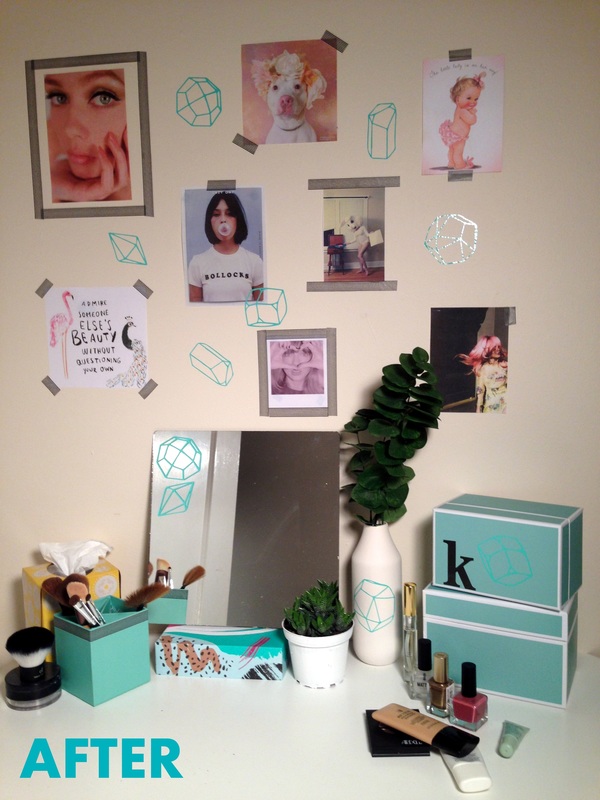
https://www.etsy.com/listing/258379023/1-inch-triangle-vinyl-nursery-wall-indie?ref=shop_home_active_7 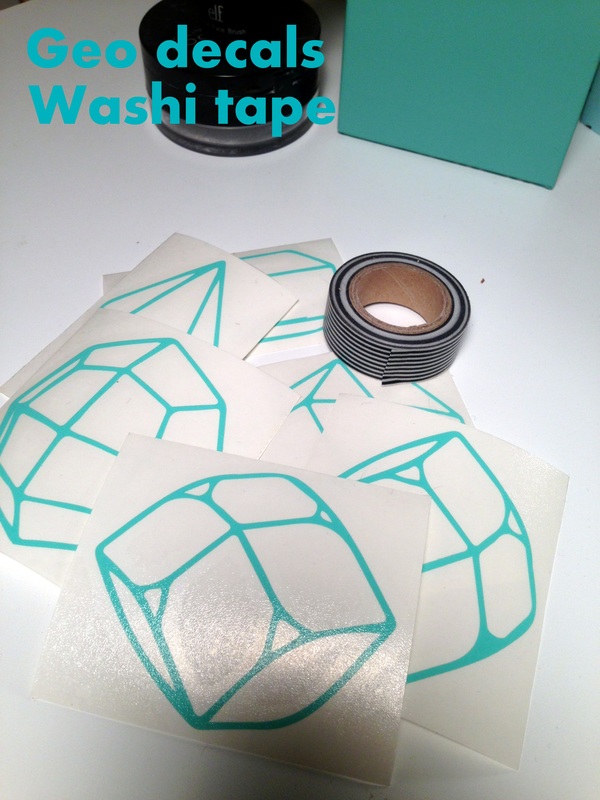 My sister, Kelsey Jeanne, just re-did a small makeup station with our gem decals and some washi tape to show you how easy it is to spruce up a small area in your home on the cheap. She also found some matching boxes at the dollar store and magazine cutouts for inspiration and a pop of color.
 We use Oracal 651 Premium Gloss & Matte Vinyl that is really easy to apply and made in the USA. It's UV resistant so it wont fade and lasts up to 6 years outdoors. With a little heat, our decals are easily removed.
Gem Decals are on sale for $5.00 for a set of 5 gems now through the end of this January!
https://www.etsy.com/listing/258140390/geometric-gem-vinyl-decal-stickers-pack?ref=shop_home_active_4 Today’s is a simple last minute DIY because I always forget teacher gifts until it’s *almost* too late! 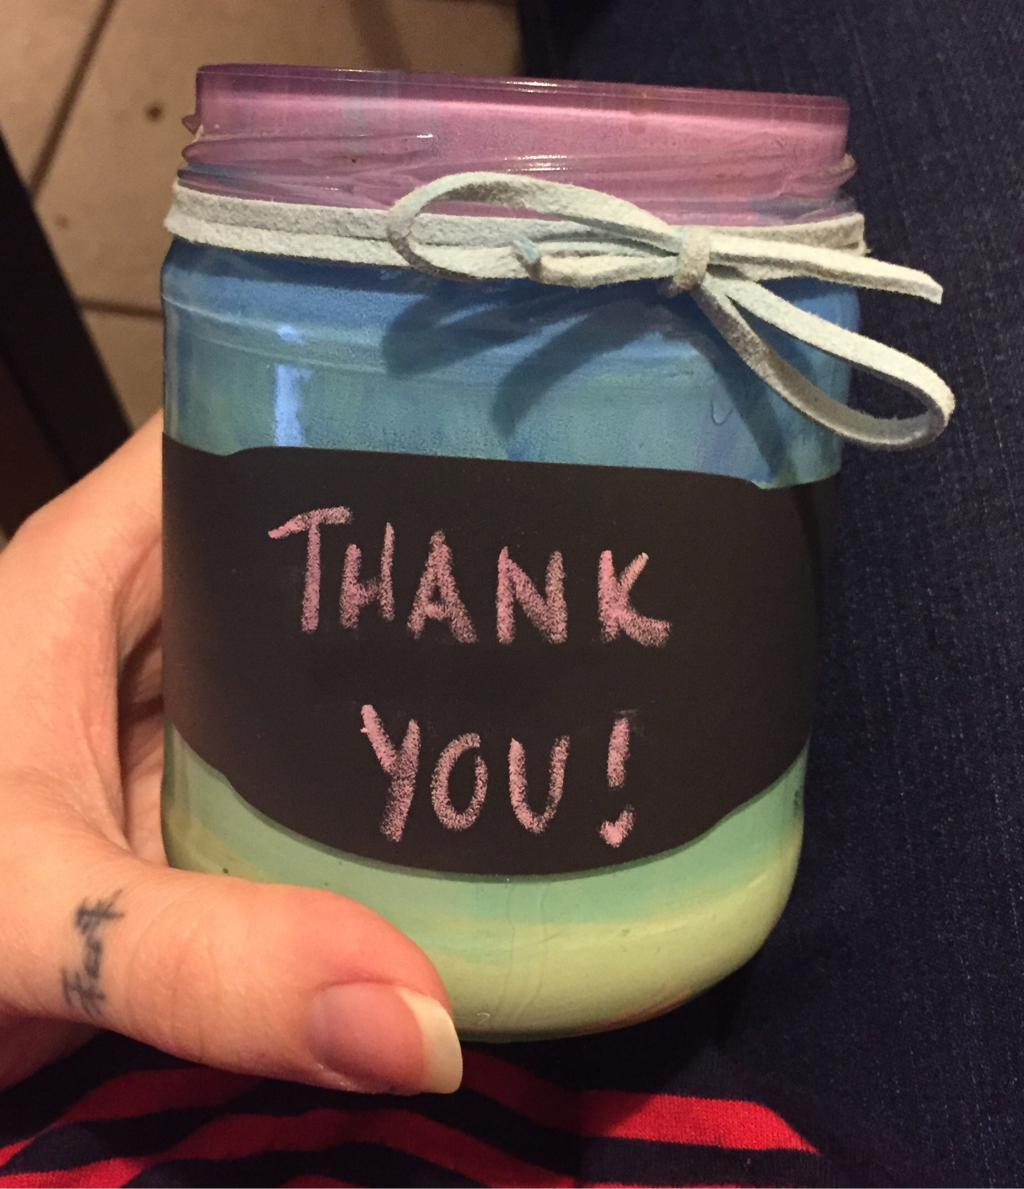 Supplies are simple and I recommend having some of our cute chalkboard vinyls on hand because they can be used to mark anything and gives a chic rustic look really effortlessly. You will need: Smooth Mason Jar – think pickle jar Acrylic Paint or Glass Paints Chalkboard Decals Paintbrush Hairdryer Things to fill the jar with – fancy pens, gift cards, book light, something cute your kid made, chocolate, tiny bottles of booze – you know something someone who spends their life around children would like ;) 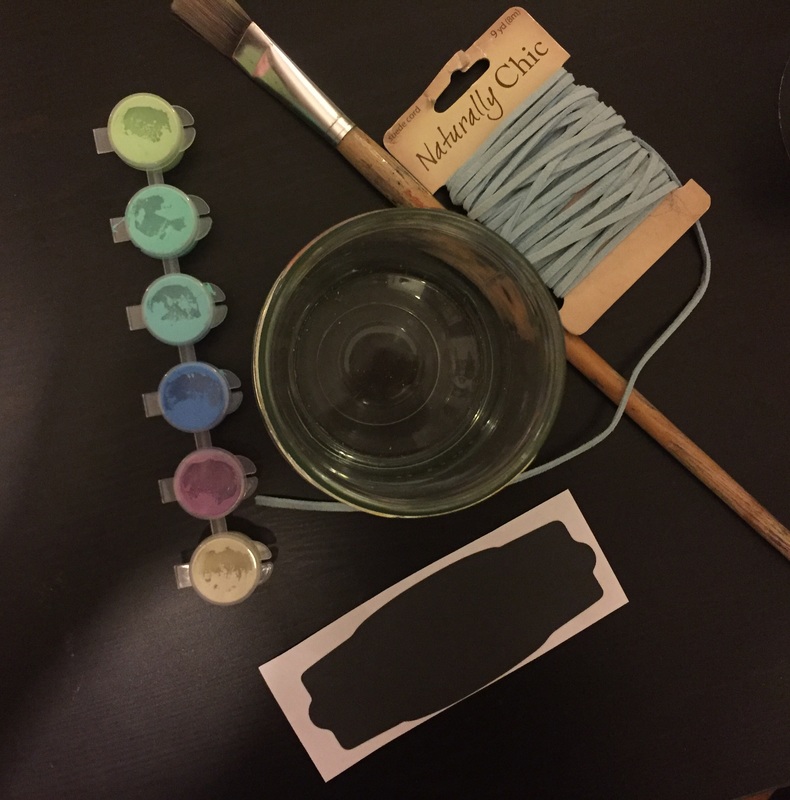 This is really easy, wash the label and goo off the outside of the jar and make sure its really dry and clean. I got these paints from the craft store for $2.00 and they are all nice matching colors. Using a thick brush and a generous amount of paint, cover the inside of the jar with any number of colors you would like. I left mine so you can see the brush strokes but you can blow dry the inside and do a second layer if you prefer. 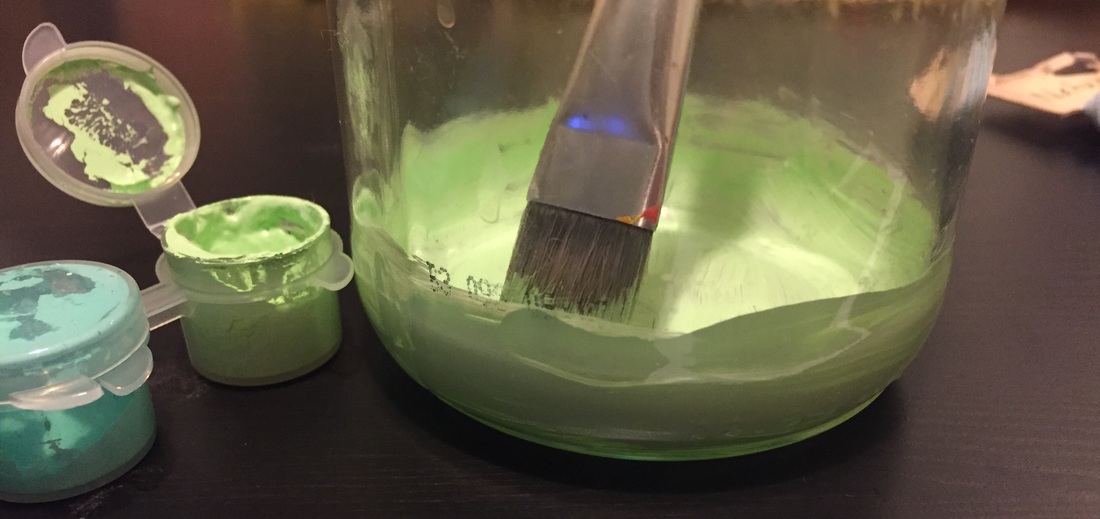 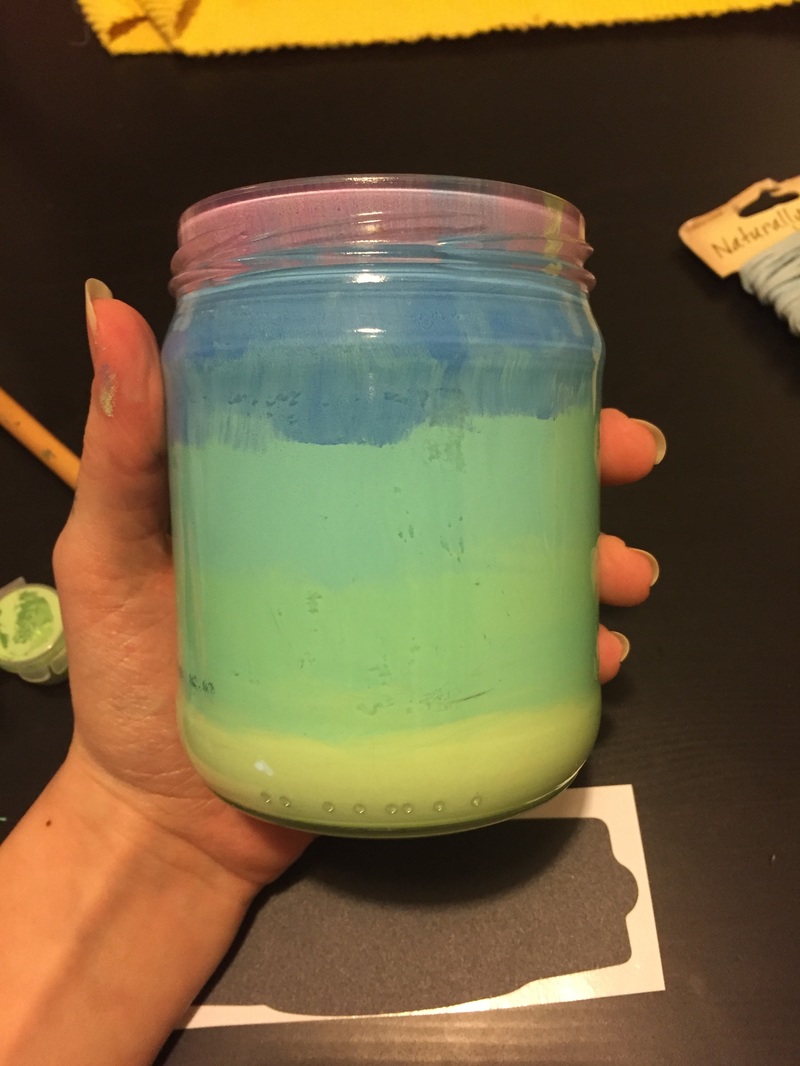 Then apply one of our chalkboard decals to the outside, write a fancy message in dry chalk, blow dry the inside and fill it with goodies! I used a blue leather strip to tie a bow. If you are feeling extra fancy you can get cellophane sheets from the dollar store and make a little package with a ribbon so nothing fall out in transit. 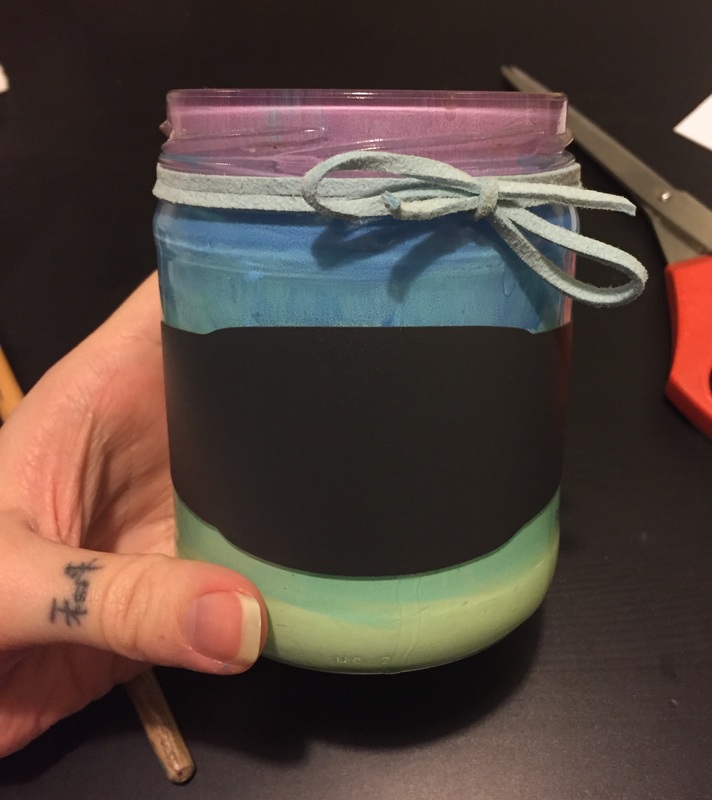 Chalkboard decals are just $8.00 per sheet until January 31 2016.
Domino Tiles Matching Game  We have a son in Kindergarten who is practicing letter sounds and when to use upper and lowercase letters. We wanted a fun way to play with him and encourage learning at home too. I saw these tiles on sale for $2.00 for 100 (can’t beat that) and just knew I would find some way to use them! The objective of the game is similar to dominoes but with letters, each player draws 5 random tiles and the youngest player goes first placing down one tile. You can connect tiles only if they have the same letter in it’s smaller or larger form (ie upper case A must be paired with a lowercase a). Once you play a tile, you choose another until no more tiles are left. We found that with just one set of 26 tiles doesn’t get you very far so I recommend making 2 or more sets for a longer game. Since we are also learning our letter sounds, before you can play a piece you need to sounds out the right letter sound. 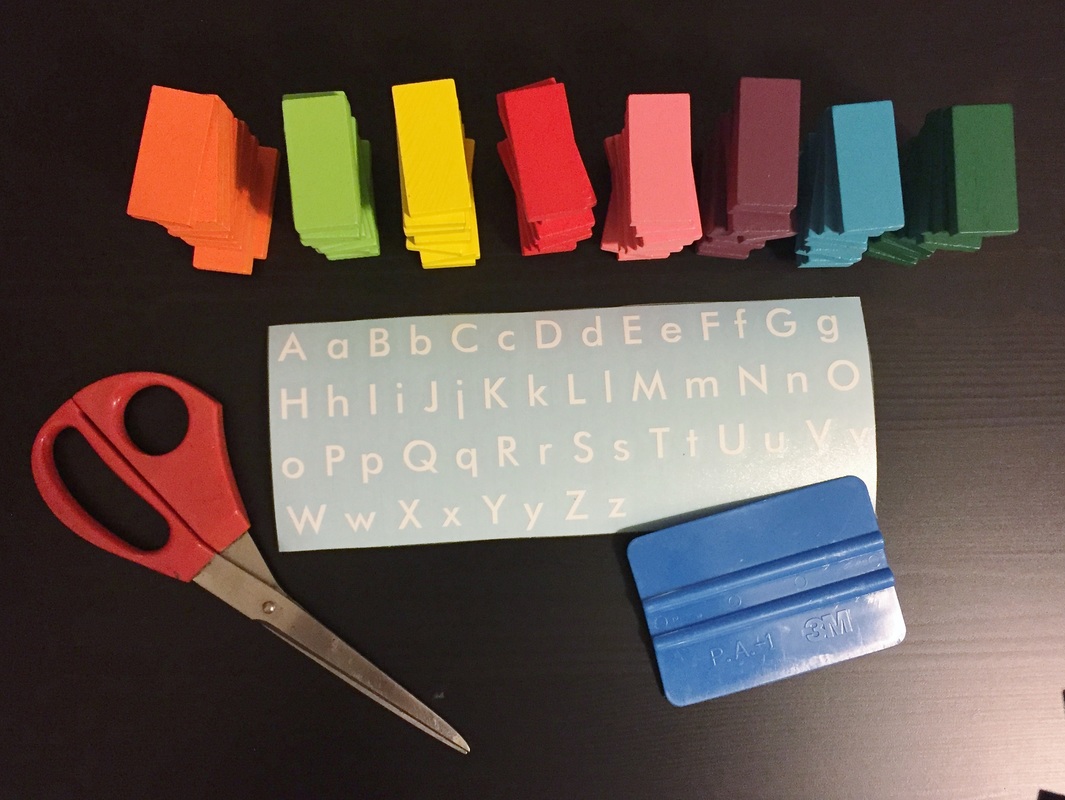 You will need: 100 Colored Wooden Domino Tiles 2 Creation Lab Alphabet Sets (2 packs) Matte Mod-podge Scissors Small Foam Brush (this will make 3 complete alphabet sets) Cut apart your letters, it’s easier to make one set at a time so you dont end up with the same letters on the same tiles which when playing with one set, can never be paired. 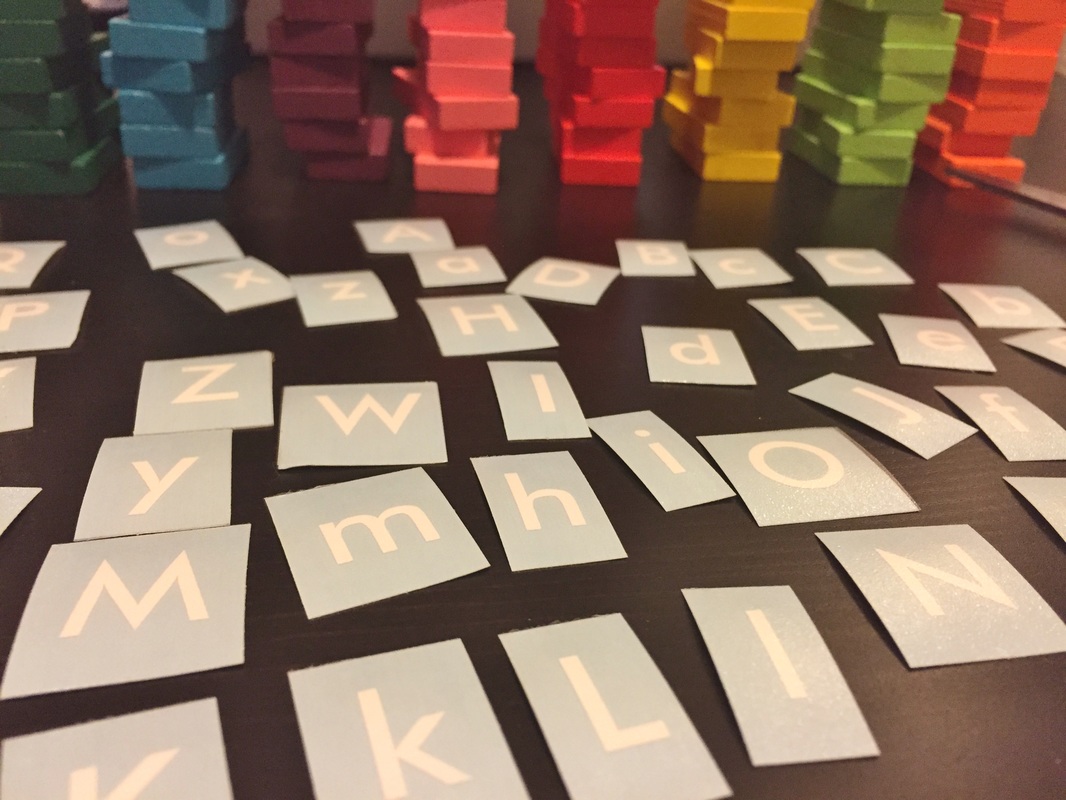 Lay out 26 of your tiles and peel the white backing paper off each uppercase letter and lay them onto the bottom half of the tiles. Use a credit card or piece of plastic to smooth out the letters. Peel off the clear transfer paper slowly. 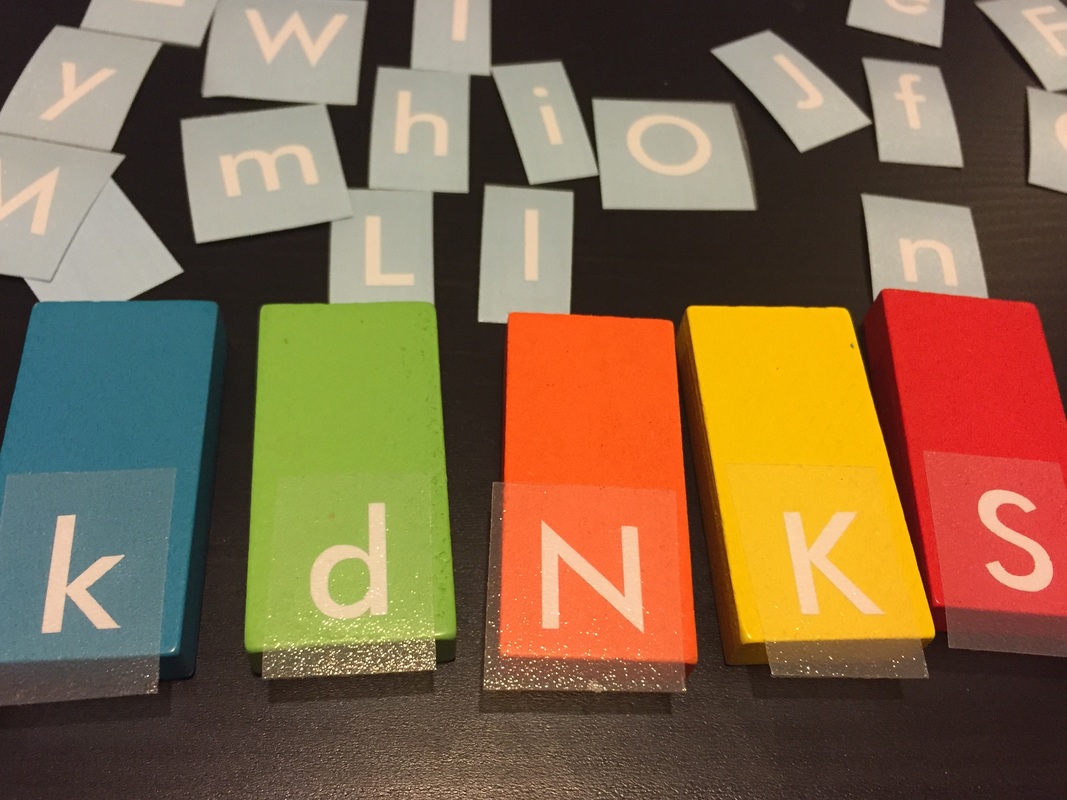 If the letters begin to peel too, rub with your thumb until they stick down. Once all the uppercase letters are applied, rotate your tiles 180 degrees and lay the lowercase letters as shown below. Make sure you have a good mix and none of the upper and lowercase letters are the same on one tile. 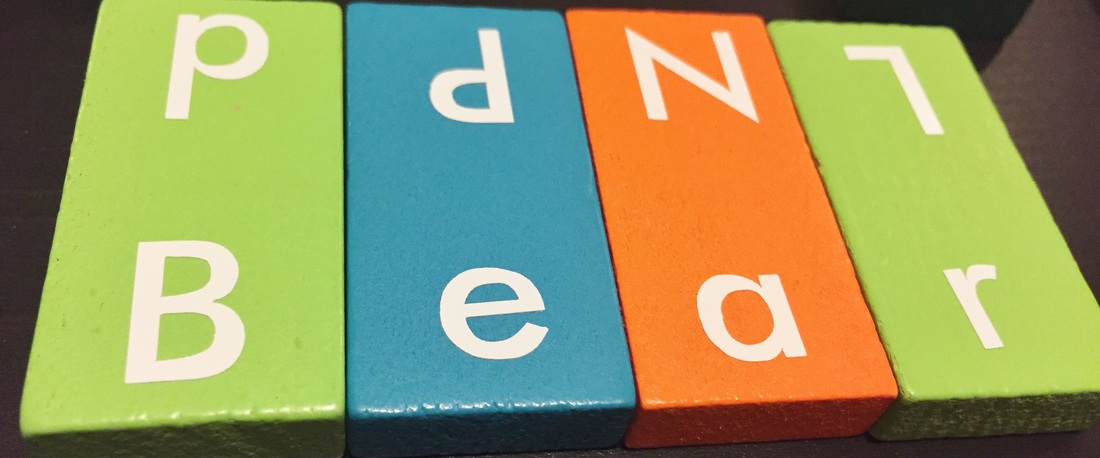 Once you are happy with the results, use your foam brush and apply a thin layer of Mod-Podge to each tile to seal them. If you want the backs of the tiles to have a design or theme you can apply other decals to the backs or use some pretty paper and more Mod-Podge. 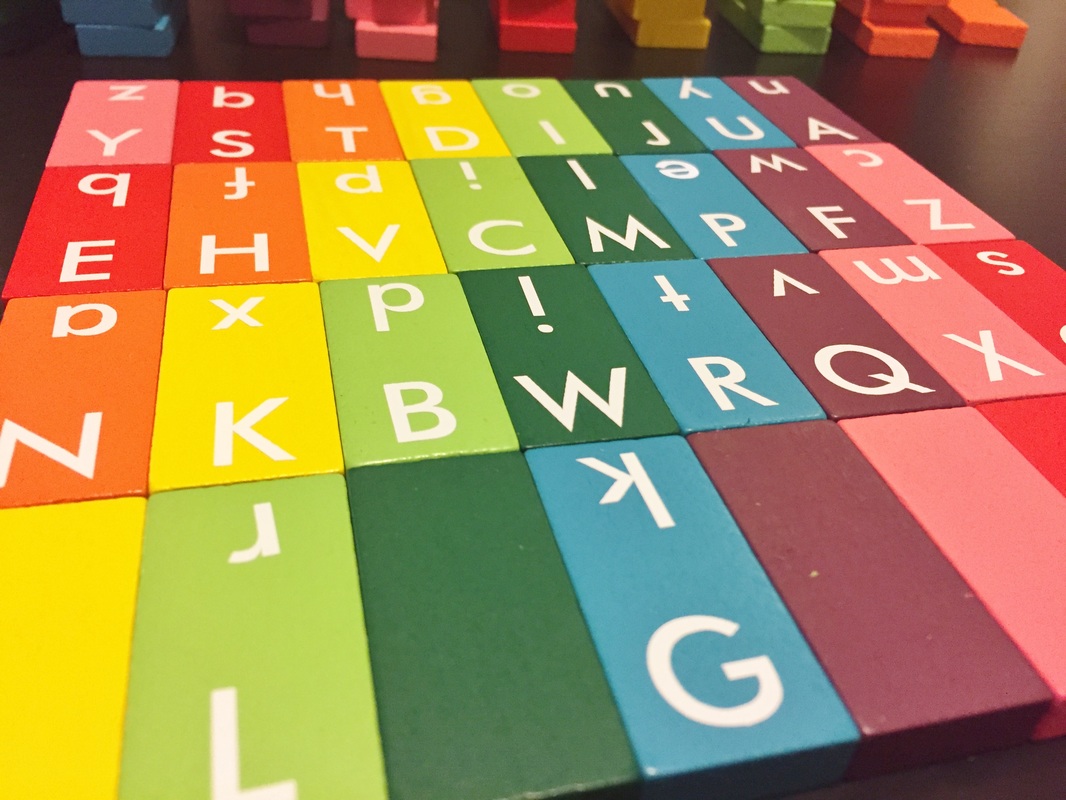 Alphabet sets include 2 sets each of upper and lowercase letters in an easy to read sans serif font. Available in Black, White, Grey, Red, Medium Blue, Lime Green & Teal Blue.
$8.00/set until January 31st, 2016 (regularly $10.00) Available for purchase on our etsy page |
Holly & TimWe are a husband and wife team with two beautiful and spunky children that have inspired the Creation Lab brand from the get-go. We are passionate about quality, well-designed products and supporting local and small business. Join us on the blog for DIY projects, pro tips and specials! Archives
June 2020
Categories |


 RSS Feed